Azure DevOps
Learn more about Sentry's Azure DevOps integration and how it can track and resolve bugs faster by using data from your Azure DevOps commits.
Track and resolve bugs faster by using data from your Azure DevOps commits. (Azure DevOps was formerly known as Visual Studio Team Services, VSTS.)
To install this integration, you need to have Sentry organization owner, manager, or admin permissions, as well as Azure organization owner permissions, or be a user in the Project Collections Administrators group.
Go to your Azure Org's settings to make sure third-party access via OAuth is enabled.
In Sentry.io, navigate to Settings > Integrations > Azure DevOps and click "Add Installation".

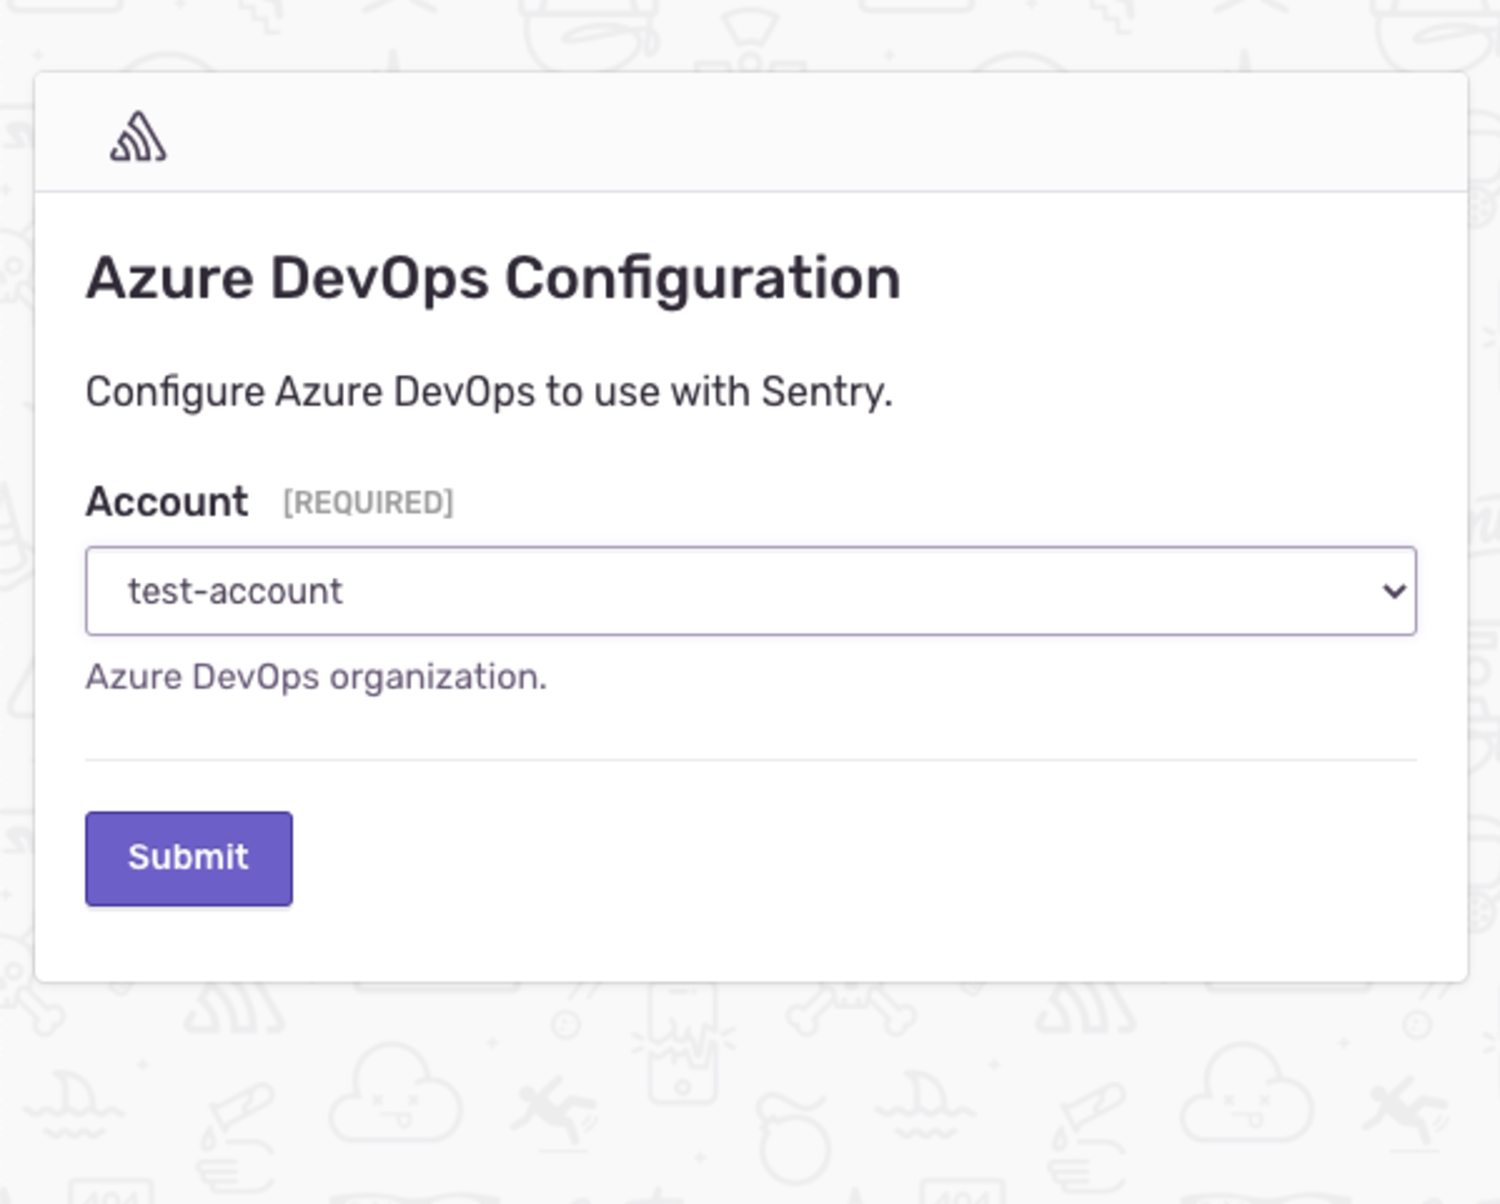
An Azure DevOps install window should pop up. Select the Azure DevOps account you'd like to link with Sentry, and press Submit.

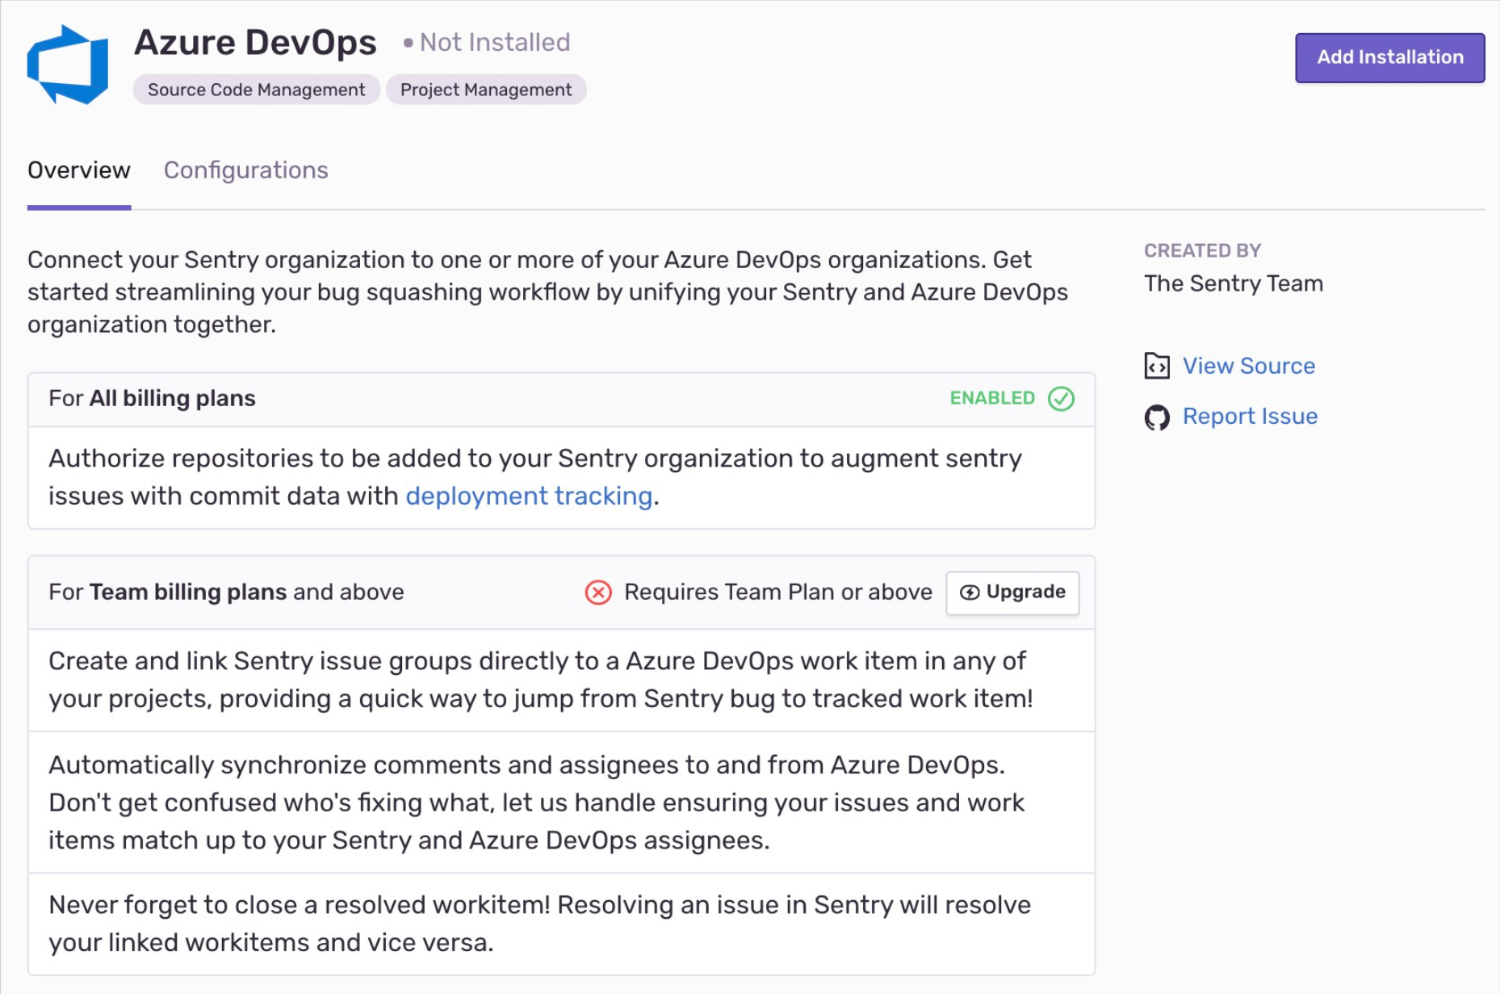
Azure DevOps should now be enabled for all projects under your Sentry organization, but you'll need to configure the features below.
Use Azure DevOps to track commits and issue management.
Commit tracking allows you to hone in on problematic commits. Uncover which commits likely caused an issue, and allow your team to resolve issues by referencing the issue number in a commit message.
For more details, see the full documentation on commit tracking and releases.
You’ll also see that the author of the suspect commit will be listed as a suggested assignee for this issue. To assign the issue to the suggested assignee, click on their icon.
Issue tracking allows you to create Azure DevOps issues from within Sentry, and link Sentry issues to existing Azure DevOps Issues.
Note
Manual issue management is available to organizations on Team, Business, and Enterprise plans.
Automatic issue management is available to organizations that include transactions in their Business and Enterprise plans.
Issue management can be configured in two ways - automatically or manually.
To configure issue management automatically, create an Issue Alert. When selecting the action, choose Create a new Azure DevOps work item.
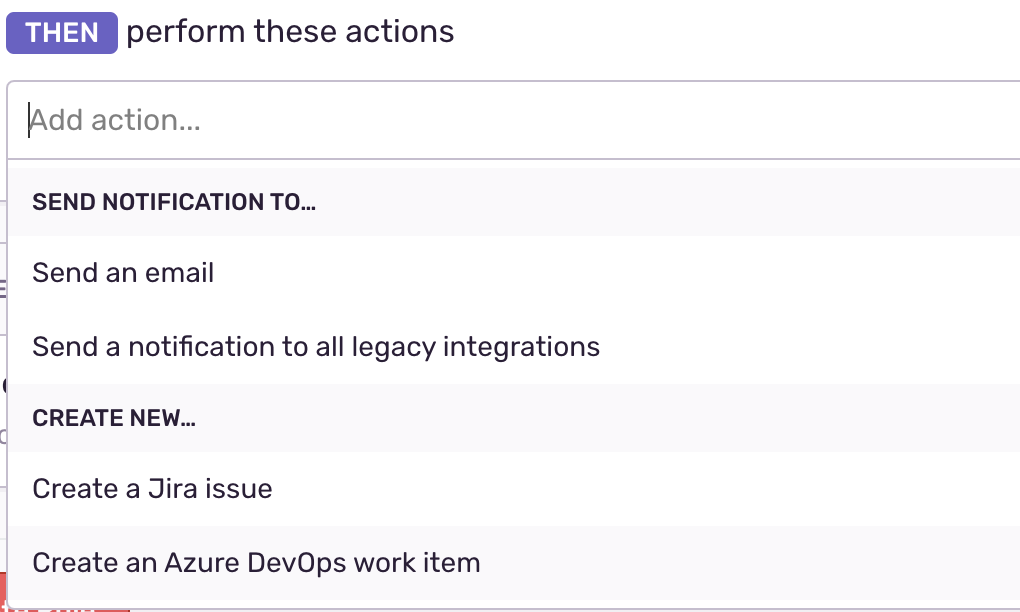
An Azure DevOps work item will be created automatically when the alert has been triggered.
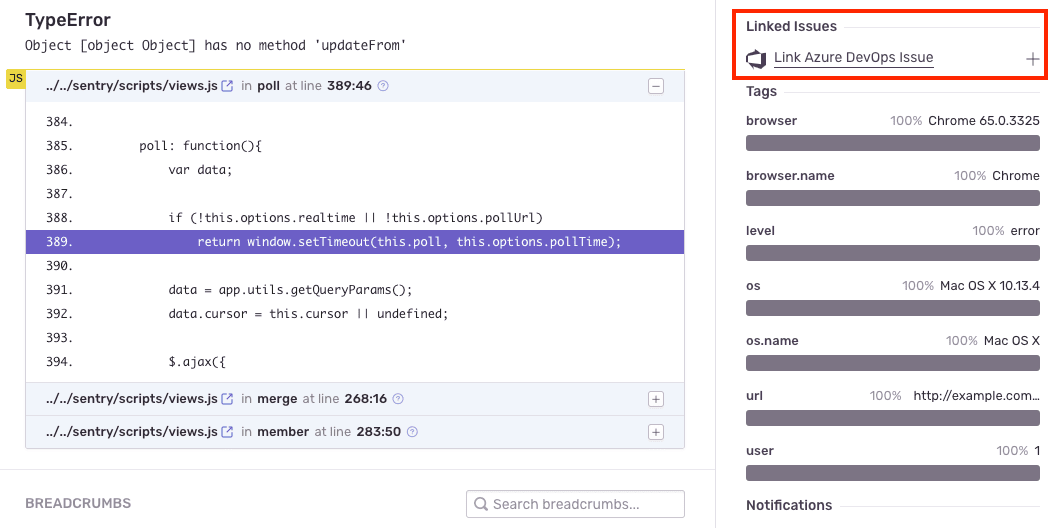
Once you’ve navigated to a specific issue, you’ll find the Linked Issues section on the right hand panel. Here, you’ll be able to create or link Azure DevOps issues.
Sync comments, assignees, and status updates for issues in Sentry to Azure DevOps, to minimize duplication. When you delegate an issue to an assignee or update a status on Azure DevOps, the updates will also populate in Sentry. When you resolve an issue in Sentry, the issue status will automatically update in Azure DevOps.
Note
Issue sync is available for organizations on the Team, Business, and Enterprise plans.
To configure Issue sync, navigate to ** Organization Settings > Integrations**, and click "Configure" next to your Azure DevOps instance. On the following page, you’ll see options of what information you’d like synced between Sentry and Azure DevOps.

Once you send commit data, you can start resolving issues by including fixes <SENTRY-SHORT-ID> in your commit messages. For example, a commit message might look like:
Prevent empty queries on users

Fixes MYAPP-317
When Sentry sees this, we’ll automatically annotate the matching issue with reference to the commit, and later, when that commit is part of a release, we’ll mark the issue as resolved. The commit must be associated with a release. Otherwise, if the commit is squashed, Sentry won’t know when the commit has been released, and the issue may never be marked as a regression.
This feature is currently only supported for Ruby, Python, Php, Node, JavaScript, Go and Elixir.
Stack trace linking takes you from a file in your Sentry stack trace to that same file in your source code. If you have commit tracking set up in Sentry, we can take you to the exact version (using the commit associated with the event) of the source code when the error occurred. Otherwise we'll link you to the current state of the source code (using the default branch).
Navigate to Settings > Integrations > Azure DevOps > Configurations.
Click "Configure" (the gear icon) next to your Azure DevOps Instance.
Click the "Code Mappings" tab.
Set up a code mapping for each project you want to have stack trace linking. To create a new code mapping, click "Add Mapping".
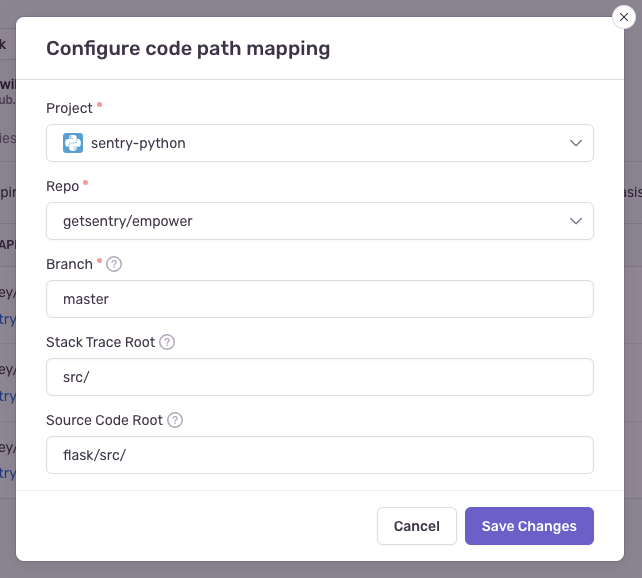
Fill out the form, then click "Save Changes". Each form field is described below:
- Project (required): This is the Sentry project.
- Repo (required): This is the Azure DevOps project associated with the Sentry project above. If you have more than one Azure DevOps project being used per Sentry project, you'll need multiple code mappings.
- Branch (required): This is the default branch of your code we fall back to if you do not have commit tracking set up.
- Stack Trace Root and Source Code Root (optional): See below for information on determining these values.
The following information is only valid for platforms which use traditional file paths. Platforms with package names require additional steps. For Java, read more in the page on source context.
First, navigate to a stack trace that you wish to map. Find an In App frame, which is denoted by a bubble on the right side of the frame. The filename will be shown as the first piece of text at the left hand side of the frame header. In this example, it is src/main.py.

For certain native platforms, the stack trace will look different. In cases like these, you can find the absolute path by hovering over the filename.
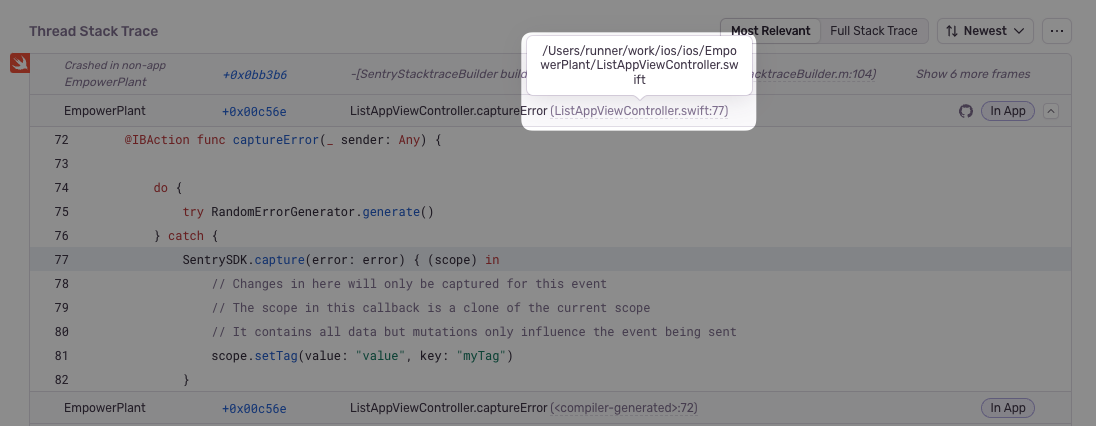
If you aren’t sure, you can look at the event JSON by clicking on the {} button in the event header. Find the text in the frame's filename or abs_path.

Next, locate the file seen in the stack trace with your source code provider (e.g. GitHub). In this example, the path is flask/src/main.py (empower is ignored since it is the name of the repo).
Compare the file path from the stack trace with the path found in your source repository. In this example, the src/ folder in the stack trace matches the flask/src folder in the source code. Using that information, set the Stack Trace Root to src/ and the Source Code Root to flask/src/. This tells Sentry to replace all file paths beginning in src/ with flask/src/ when searching for the source code.
For best results, we recommend always providing a non-empty value for the Stack Trace Root when possible.
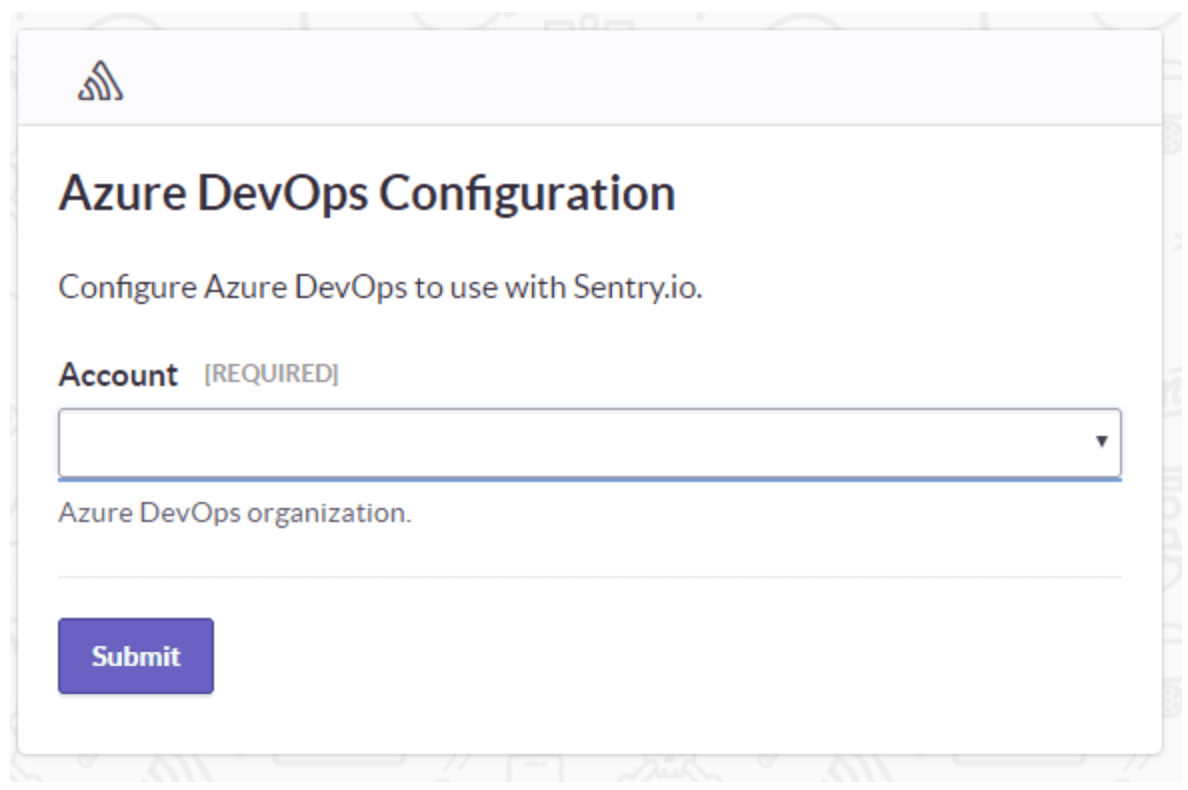
If you reach the account selection page during the Azure Devops installation process (step 4 in the instructions above) and see that there are no accounts available to select, please check the following possibilities:
- Ensure you are logged into the account connected to your Azure DevOps organization.
- Double-check that your account is a Microsoft Account (MSA).
- For single sign-on, see Azure Active Directory SSO.
- If you have multiple accounts in Azure DevOps, open this link to Azure DevOps in another tab, select the correct account, then reinstall.
If reinstallation solves the problem, please upvote that solution in GitHub, which is where we're tracking this improvement.
Our documentation is open source and available on GitHub. Your contributions are welcome, whether fixing a typo (drat!) or suggesting an update ("yeah, this would be better").